In this topic, we'll go over the detailed steps to install ntfy, a notification server, using Docker. We'll cover different methods, including basic usage, persistent cache configuration, custom configurations, and Docker Compose setups.
What is Ntfy?
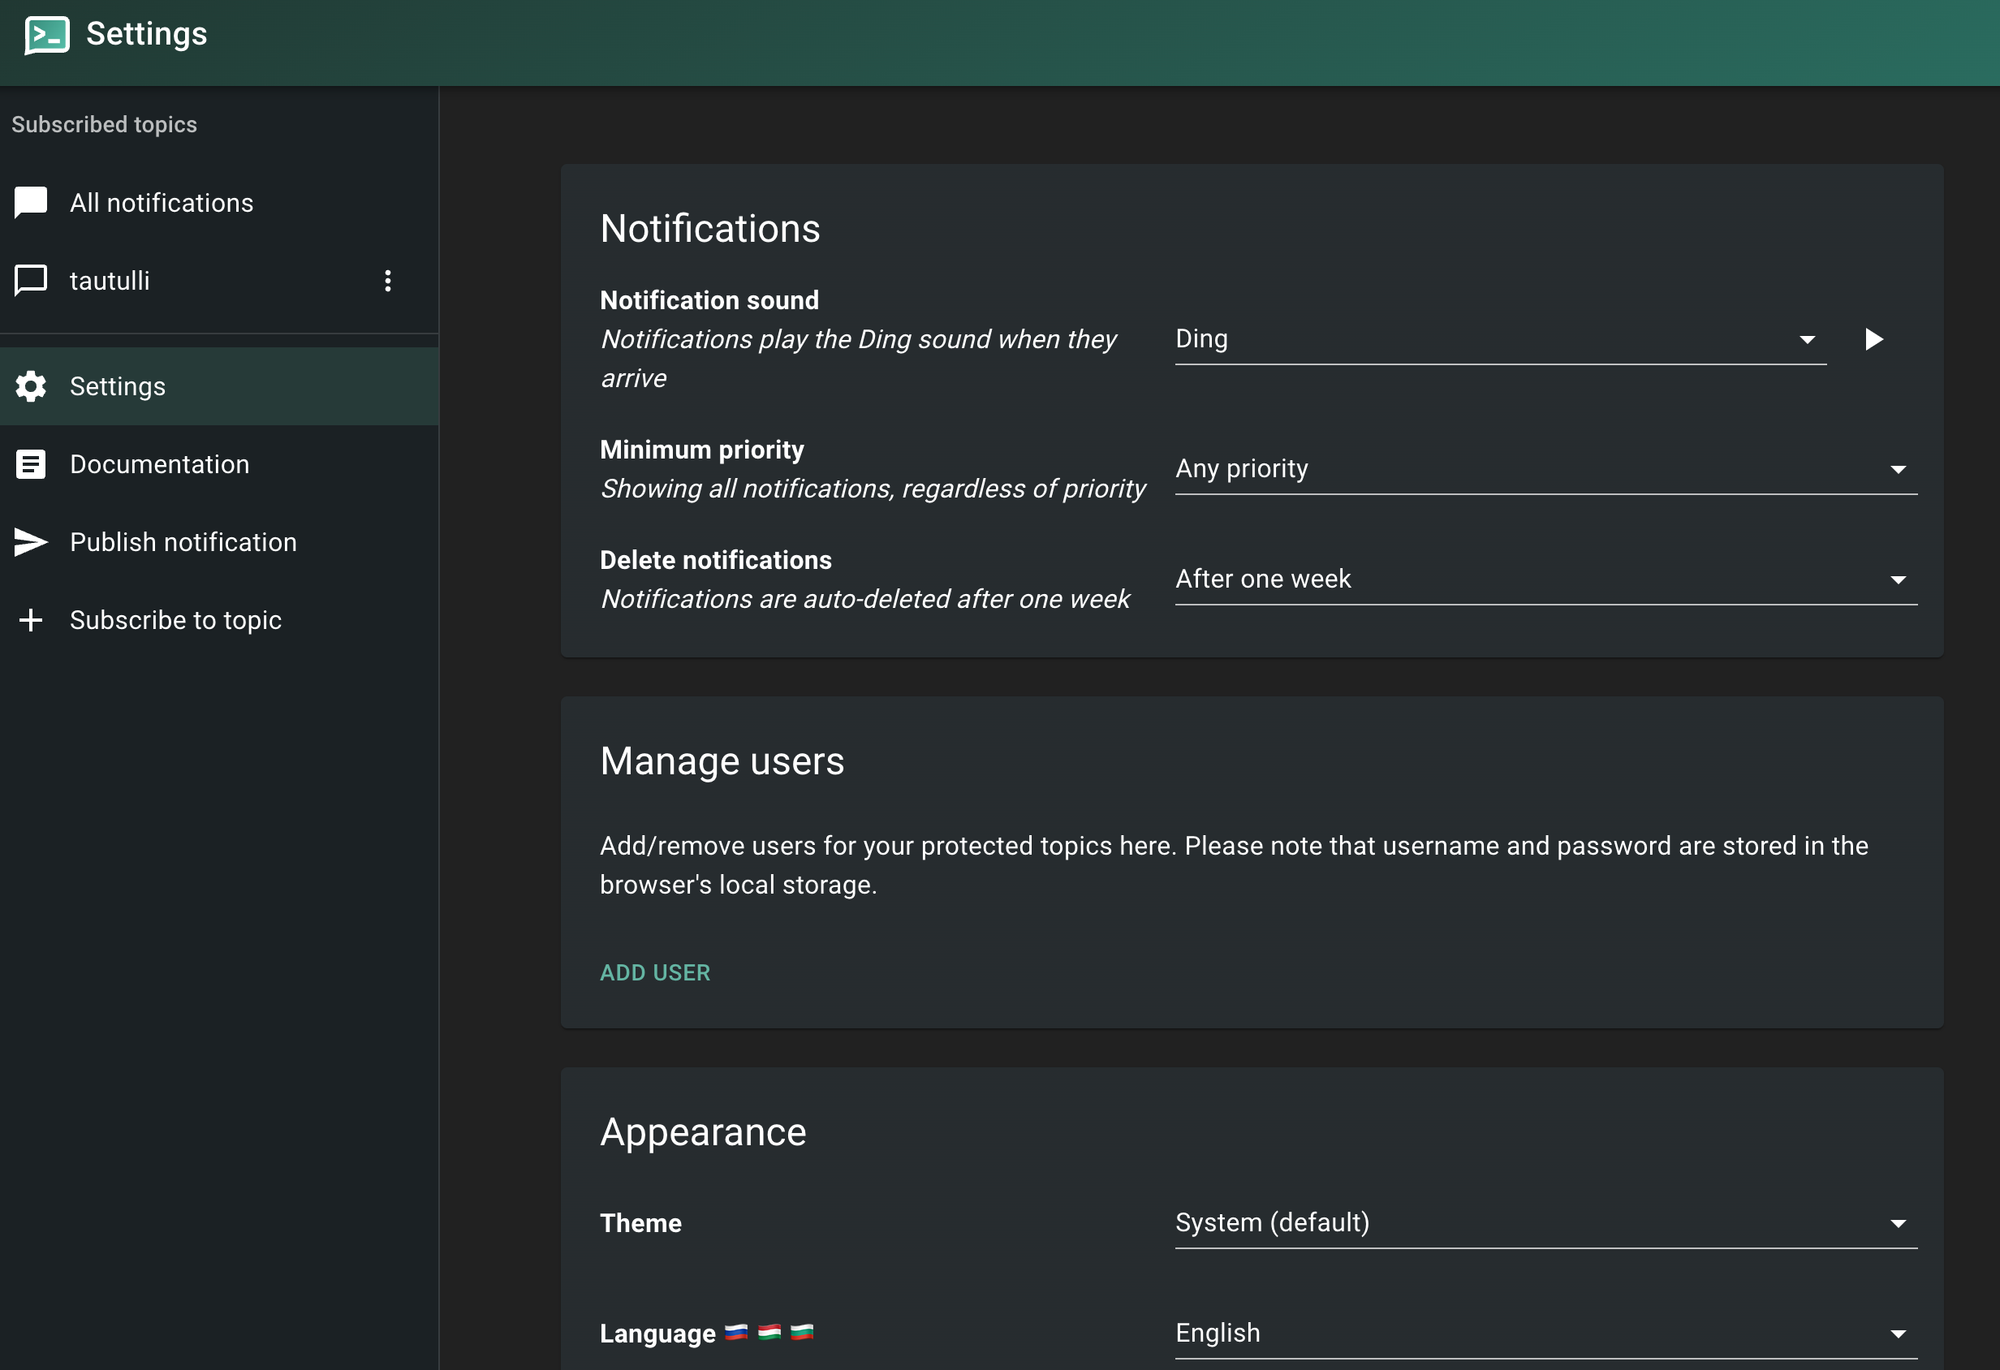
Ntfy is a simple, self-hosted notification server that you can use to send notifications via HTTP POST. It's versatile and can be used across different platforms, making it an ideal choice for personal notifications or for integrating into your development projects.
Prerequisites
Docker installed on your machine
Basic knowledge of Docker command usage and volume management
Installation Methods
1. Basic Usage
For a basic ntfy setup without any persistent caching or additional configuration:
docker run -p 80:80 -it binwiederhier/ntfy serve
This command runs ntfy in Docker, exposing it on port 80 of your host, making it accessible via http://localhost.
2. With Persistent Cache
To enable persistent caching, which allows ntfy to store messages across container restarts, you can mount a volume for the cache:
Replace UID:GID with your user ID and group ID to run the container as a non-root user. This method assumes you have a server.yml file in your /etc/ntfy directory on your host.
4. Using Docker Compose
For more complex setups, such as using Docker Compose, here’s an example configuration:
version: "2.3"

services:
  ntfy:
    image: binwiederhier/ntfy
    container_name: ntfy
    command:
      - serve
    environment:
      - TZ=UTC    # optional: set desired timezone
    user: UID:GID # optional: replace with your own user/group or uid/gid
    volumes:
      - /var/cache/ntfy:/var/cache/ntfy
      - /etc/ntfy:/etc/ntfy
    ports:
      - 80:80
    healthcheck: # optional: remember to adapt the host:port to your environment
        test: ["CMD-SHELL", "wget -q --tries=1 http://localhost:80/v1/health -O - | grep -Eo '"healthy"\s*:\s*true' || exit 1"]
        interval: 60s
        timeout: 10s
        retries: 3
        start_period: 40s
    restart: unless-stopped
This docker-compose.yml sets up ntfy with environmental variables, volume mounts for persistent data, and health checks.
Exploring Ntfy: Uses and Webhook Notifications
In this blog post, we will delve into the various uses of ntfy, a simple yet powerful self-hosted notification tool, and how you can leverage it to send notifications via webhooks. This utility is particularly beneficial for developers and system administrators who need a straightforward way to implement real-time alerts for their systems and applications.
What is Ntfy?
Ntfy is an open-source notification service that allows you to send notifications through HTTP POST requests. It's designed to be minimalistic and easy to deploy, supporting multiple platforms and devices.
Key Features and Uses of Ntfy
1. System Monitoring
Server Alerts: Configure ntfy to send alerts about server performance metrics like CPU usage, disk space, or downtime.
Application Monitoring: Receive updates regarding the status of applications, such as crash reports or performance degradation.
2. Event Notifications
Calendar Events: Send reminders for upcoming meetings or deadlines.
Task Completion: Notify team members when a task or process, such as a batch job or backup, has completed.
3. IoT Notifications
Home Automation: Get notifications from smart home devices, like when motion is detected or a door is opened.
Environmental Alerts: Monitor sensors and receive alerts for changes in temperature, humidity, or smoke detection.
Sending Notifications via Webhooks
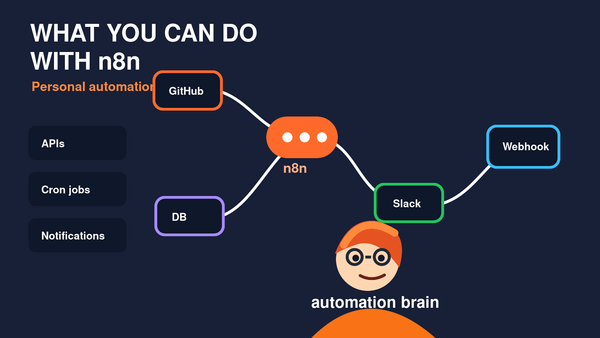
Webhooks are an efficient way to send real-time notifications via ntfy. They allow you to push updates to your devices or to a team's messaging platform like Slack or Discord.
Basic Webhook Usage
To send a notification via webhook, you can use a simple curl command:
curl -d "MESSAGE" https://<ntfy-server-ip>/topic
Example: Sending Server Load Alerts
Here's how you might set up a script to send a notification when server load exceeds a certain threshold:
#!/bin/bash
# Check server load
load=$(uptime | awk '{print $(NF-2)}')
threshold=2.00

# Compare load and send notification if it's too high
if (( $(echo "$load > $threshold" | bc -l) )); then
    curl -X POST http://<ntfy-server-ip>/topic/server-alerts -d "High server load detected: $load"
fi
Advanced Integration: Slack Notifications
Integrate ntfy with Slack by using incoming webhooks:
Create an Incoming Webhook on Slack: Go to your Slack App configurations and set up an incoming webhook.
Send Notification via ntfy:
curl -X POST http://<ntfy-server-ip>/topic/slack-channel -d '{"text": "Hello from ntfy!"}' -H "Content-Type: application/json"
Integrating Ntfy with iOS and Configuring the server.yml File
This covers how to integrate the ntfy app with iOS for receiving notifications and detail the steps to configure and place the server.yml configuration file on a server.
Using Ntfy with iOS
The ntfy iOS app allows you to receive notifications from your self-hosted ntfy server directly on your iPhone. Here’s how to set it up:
Install the ntfy App: Download and install the ntfy app from the App Store.
Connect to Your Server: Open the app and add a new server by entering the URL of your ntfy instance.
Subscribe to Topics: Subscribe to specific topics on your server to start receiving notifications related to those topics.
Key Configuration for iOS Notifications
To ensure the iOS app functions correctly, especially for a self-hosted server, you need to configure the base-url in your server.yml. This URL is crucial for the app to fetch notifications correctly and to enable features like attachments and iOS push notifications.
base-url: "https://your-ntfy-domain.com"
Replace "https://your-ntfy-domain.com" with the public facing URL of your server.
Uncomment "upstream-base-url: 'https://ntfy.sh'" if you wish to get notifications in the iOS app.
Configuring the server.yml File
The server.yml file contains configuration settings for your ntfy server. It is not included by default in the Docker image and needs to be created manually if you want to customize the server's behavior beyond default settings.
server.yml template
# ntfy server config file
#
# Please refer to the documentation at https://ntfy.sh/docs/config/ for details.
# All options also support underscores (_) instead of dashes (-) to comply with the YAML spec.

# Public facing base URL of the service (e.g. https://ntfy.sh or https://ntfy.example.com)
#
# This setting is required for any of the following features:
# - attachments (to return a download URL)
# - e-mail sending (for the topic URL in the email footer)
# - iOS push notifications for self-hosted servers (to calculate the Firebase poll_request topic)
# - Matrix Push Gateway (to validate that the pushkey is correct)
#
# base-url:

# Listen address for the HTTP & HTTPS web server. If "listen-https" is set, you must also
# set "key-file" and "cert-file". Format: []:, e.g. "1.2.3.4:8080".
#
# To listen on all interfaces, you may omit the IP address, e.g. ":443".
# To disable HTTP, set "listen-http" to "-".
#
# listen-http: ":80"
# listen-https:

# Listen on a Unix socket, e.g. /var/lib/ntfy/ntfy.sock
# This can be useful to avoid port issues on local systems, and to simplify permissions.
#
# listen-unix:
# listen-unix-mode:

# Path to the private key & cert file for the HTTPS web server. Not used if "listen-https" is not set.
#
# key-file:
# cert-file:

# If set, also publish messages to a Firebase Cloud Messaging (FCM) topic for your app.
# This is optional and only required to save battery when using the Android app.
#
# firebase-key-file:

# If "cache-file" is set, messages are cached in a local SQLite database instead of only in-memory.
# This allows for service restarts without losing messages in support of the since= parameter.
#
# The "cache-duration" parameter defines the duration for which messages will be buffered
# before they are deleted. This is required to support the "since=..." and "poll=1" parameter.
# To disable the cache entirely (on-disk/in-memory), set "cache-duration" to 0.
# The cache file is created automatically, provided that the correct permissions are set.
#
# The "cache-startup-queries" parameter allows you to run commands when the database is initialized,
# e.g. to enable WAL mode (see https://phiresky.github.io/blog/2020/sqlite-performance-tuning/)).
# Example:
#    cache-startup-queries: |
#       pragma journal_mode = WAL;
#       pragma synchronous = normal;
#       pragma temp_store = memory;
#       pragma busy_timeout = 15000;
#       vacuum;
#
# The "cache-batch-size" and "cache-batch-timeout" parameter allow enabling async batch writing
# of messages. If set, messages will be queued and written to the database in batches of the given
# size, or after the given timeout. This is only required for high volume servers.
#
# Debian/RPM package users:
#   Use /var/cache/ntfy/cache.db as cache file to avoid permission issues. The package
#   creates this folder for you.
#
# Check your permissions:
#   If you are running ntfy with systemd, make sure this cache file is owned by the
#   ntfy user and group by running: chown ntfy.ntfy .
#
# cache-file:
# cache-duration: "12h"
# cache-startup-queries:
# cache-batch-size: 0
# cache-batch-timeout: "0ms"

# If set, access to the ntfy server and API can be controlled on a granular level using
# the 'ntfy user' and 'ntfy access' commands. See the --help pages for details, or check the docs.
#
# - auth-file is the SQLite user/access database; it is created automatically if it doesn't already exist
# - auth-default-access defines the default/fallback access if no access control entry is found; it can be
#   set to "read-write" (default), "read-only", "write-only" or "deny-all".
# - auth-startup-queries allows you to run commands when the database is initialized, e.g. to enable
#   WAL mode. This is similar to cache-startup-queries. See above for details.
#
# Debian/RPM package users:
#   Use /var/lib/ntfy/user.db as user database to avoid permission issues. The package
#   creates this folder for you.
#
# Check your permissions:
#   If you are running ntfy with systemd, make sure this user database file is owned by the
#   ntfy user and group by running: chown ntfy.ntfy .
#
# auth-file:
# auth-default-access: "read-write"
# auth-startup-queries:

# If set, the X-Forwarded-For header is used to determine the visitor IP address
# instead of the remote address of the connection.
#
# WARNING: If you are behind a proxy, you must set this, otherwise all visitors are rate limited
#          as if they are one.
#
# behind-proxy: false

# If enabled, clients can attach files to notifications as attachments. Minimum settings to enable attachments
# are "attachment-cache-dir" and "base-url".
#
# - attachment-cache-dir is the cache directory for attached files
# - attachment-total-size-limit is the limit of the on-disk attachment cache directory (total size)
# - attachment-file-size-limit is the per-file attachment size limit (e.g. 300k, 2M, 100M)
# - attachment-expiry-duration is the duration after which uploaded attachments will be deleted (e.g. 3h, 20h)
#
# attachment-cache-dir:
# attachment-total-size-limit: "5G"
# attachment-file-size-limit: "15M"
# attachment-expiry-duration: "3h"

# If enabled, allow outgoing e-mail notifications via the 'X-Email' header. If this header is set,
# messages will additionally be sent out as e-mail using an external SMTP server.
#
# As of today, only SMTP servers with plain text auth (or no auth at all), and STARTLS are supported.
# Please also refer to the rate limiting settings below (visitor-email-limit-burst & visitor-email-limit-burst).
#
# - smtp-sender-addr is the hostname:port of the SMTP server
# - smtp-sender-from is the e-mail address of the sender
# - smtp-sender-user/smtp-sender-pass are the username and password of the SMTP user (leave blank for no auth)
#
# smtp-sender-addr:
# smtp-sender-from:
# smtp-sender-user:
# smtp-sender-pass:

# If enabled, ntfy will launch a lightweight SMTP server for incoming messages. Once configured, users can send
# emails to a topic e-mail address to publish messages to a topic.
#
# - smtp-server-listen defines the IP address and port the SMTP server will listen on, e.g. :25 or 1.2.3.4:25
# - smtp-server-domain is the e-mail domain, e.g. ntfy.sh
# - smtp-server-addr-prefix is an optional prefix for the e-mail addresses to prevent spam. If set to "ntfy-",
#   for instance, only e-mails to ntfy-$topic@ntfy.sh will be accepted. If this is not set, all emails to
#   $topic@ntfy.sh will be accepted (which may obviously be a spam problem).
#
# smtp-server-listen:
# smtp-server-domain:
# smtp-server-addr-prefix:

# Web Push support (background notifications for browsers)
#
# If enabled, allows ntfy to receive push notifications, even when the ntfy web app is closed. When enabled, users
# can enable background notifications in the web app. Once enabled, ntfy will forward published messages to the push
# endpoint, which will then forward it to the browser.
#
# You must configure web-push-public/private key, web-push-file, and web-push-email-address below to enable Web Push.
# Run "ntfy webpush keys" to generate the keys.
#
# - web-push-public-key is the generated VAPID public key, e.g. AA1234BBCCddvveekaabcdfqwertyuiopasdfghjklzxcvbnm1234567890
# - web-push-private-key is the generated VAPID private key, e.g. AA2BB1234567890abcdefzxcvbnm1234567890
# - web-push-file is a database file to keep track of browser subscription endpoints, e.g. `/var/cache/ntfy/webpush.db`
# - web-push-email-address is the admin email address send to the push provider, e.g. `sysadmin@example.com`
# - web-push-startup-queries is an optional list of queries to run on startup`
#
# web-push-public-key:
# web-push-private-key:
# web-push-file:
# web-push-email-address:
# web-push-startup-queries:

# If enabled, ntfy can perform voice calls via Twilio via the "X-Call" header.
#
# - twilio-account is the Twilio account SID, e.g. AC12345beefbeef67890beefbeef122586
# - twilio-auth-token is the Twilio auth token, e.g. affebeef258625862586258625862586
# - twilio-phone-number is the outgoing phone number you purchased, e.g. +18775132586
# - twilio-verify-service is the Twilio Verify service SID, e.g. VA12345beefbeef67890beefbeef122586
#
# twilio-account:
# twilio-auth-token:
# twilio-phone-number:
# twilio-verify-service:

# Interval in which keepalive messages are sent to the client. This is to prevent
# intermediaries closing the connection for inactivity.
#
# Note that the Android app has a hardcoded timeout at 77s, so it should be less than that.
#
# keepalive-interval: "45s"

# Interval in which the manager prunes old messages, deletes topics
# and prints the stats.
#
# manager-interval: "1m"

# Defines topic names that are not allowed, because they are otherwise used. There are a few default topics
# that cannot be used (e.g. app, account, settings, ...). To extend the default list, define them here.
#
# Example:
#   disallowed-topics:
#     - about
#     - pricing
#     - contact
#
# disallowed-topics:

# Defines the root path of the web app, or disables the web app entirely.
#
# Can be any simple path, e.g. "/", "/app", or "/ntfy". For backwards-compatibility reasons,
# the values "app" (maps to "/"), "home" (maps to "/app"), or "disable" (maps to "") to disable
# the web app entirely.
#
# web-root: /

# Various feature flags used to control the web app, and API access, mainly around user and
# account management.
#
# - enable-signup allows users to sign up via the web app, or API
# - enable-login allows users to log in via the web app, or API
# - enable-reservations allows users to reserve topics (if their tier allows it)
#
# enable-signup: false
# enable-login: false
# enable-reservations: false

# Server URL of a Firebase/APNS-connected ntfy server (likely "https://ntfy.sh").
#
# iOS users:
#   If you use the iOS ntfy app, you MUST configure this to receive timely notifications. You'll like want this:
#   upstream-base-url: "https://ntfy.sh"
#
# If set, all incoming messages will publish a "poll_request" message to the configured upstream server, containing
# the message ID of the original message, instructing the iOS app to poll this server for the actual message contents.
# This is to prevent the upstream server and Firebase/APNS from being able to read the message.
#
# - upstream-base-url is the base URL of the upstream server. Should be "https://ntfy.sh".
# - upstream-access-token is the token used to authenticate with the upstream server. This is only required
#   if you exceed the upstream rate limits, or the uptream server requires authentication.
#
# upstream-base-url:
# upstream-access-token:

# Configures message-specific limits
#
# - message-size-limit defines the max size of a message body. Please note message sizes >4K are NOT RECOMMENDED,
#   and largely untested. If FCM and/or APNS is used, the limit should stay 4K, because their limits are around that size.
#   If you increase this size limit regardless, FCM and APNS will NOT work for large messages.
# - message-delay-limit defines the max delay of a message when using the "Delay" header.
#
# message-size-limit: "4k"
# message-delay-limit: "3d"

# Rate limiting: Total number of topics before the server rejects new topics.
#
# global-topic-limit: 15000

# Rate limiting: Number of subscriptions per visitor (IP address)
#
# visitor-subscription-limit: 30

# Rate limiting: Allowed GET/PUT/POST requests per second, per visitor:
# - visitor-request-limit-burst is the initial bucket of requests each visitor has
# - visitor-request-limit-replenish is the rate at which the bucket is refilled
# - visitor-request-limit-exempt-hosts is a comma-separated list of hostnames, IPs or CIDRs to be
#   exempt from request rate limiting. Hostnames are resolved at the time the server is started.
#   Example: "1.2.3.4,ntfy.example.com,8.7.6.0/24"
#
# visitor-request-limit-burst: 60
# visitor-request-limit-replenish: "5s"
# visitor-request-limit-exempt-hosts: ""

# Rate limiting: Hard daily limit of messages per visitor and day. The limit is reset
# every day at midnight UTC. If the limit is not set (or set to zero), the request
# limit (see above) governs the upper limit.
#
# visitor-message-daily-limit: 0

# Rate limiting: Allowed emails per visitor:
# - visitor-email-limit-burst is the initial bucket of emails each visitor has
# - visitor-email-limit-replenish is the rate at which the bucket is refilled
#
# visitor-email-limit-burst: 16
# visitor-email-limit-replenish: "1h"

# Rate limiting: Attachment size and bandwidth limits per visitor:
# - visitor-attachment-total-size-limit is the total storage limit used for attachments per visitor
# - visitor-attachment-daily-bandwidth-limit is the total daily attachment download/upload traffic limit per visitor
#
# visitor-attachment-total-size-limit: "100M"
# visitor-attachment-daily-bandwidth-limit: "500M"

# Rate limiting: Enable subscriber-based rate limiting (mostly used for UnifiedPush)
#
# If subscriber-based rate limiting is enabled, messages published on UnifiedPush topics** (topics starting with "up")
# will be counted towards the "rate visitor" of the topic. A "rate visitor" is the first subscriber to the topic.
#
# Once enabled, a client subscribing to UnifiedPush topics via HTTP stream, or websockets, will be automatically registered as
# a "rate visitor", i.e. the visitor whose rate limits will be used when publishing on this topic. Note that setting the rate visitor
# requires **read-write permission** on the topic.
#
# If this setting is enabled, publishing to UnifiedPush topics will lead to a HTTP 507 response if
# no "rate visitor" has been previously registered. This is to avoid burning the publisher's "visitor-message-daily-limit".
#
# visitor-subscriber-rate-limiting: false

# Payments integration via Stripe
#
# - stripe-secret-key is the key used for the Stripe API communication. Setting this values
#   enables payments in the ntfy web app (e.g. Upgrade dialog). See https://dashboard.stripe.com/apikeys.
# - stripe-webhook-key is the key required to validate the authenticity of incoming webhooks from Stripe.
#   Webhooks are essential up keep the local database in sync with the payment provider. See https://dashboard.stripe.com/webhooks.
# - billing-contact is an email address or website displayed in the "Upgrade tier" dialog to let people reach
#   out with billing questions. If unset, nothing will be displayed.
#
# stripe-secret-key:
# stripe-webhook-key:
# billing-contact:

# Metrics
#
# ntfy can expose Prometheus-style metrics via a /metrics endpoint, or on a dedicated listen IP/port.
# Metrics may be considered sensitive information, so before you enable them, be sure you know what you are
# doing, and/or secure access to the endpoint in your reverse proxy.
#
# - enable-metrics enables the /metrics endpoint for the default ntfy server (i.e. HTTP, HTTPS and/or Unix socket)
# - metrics-listen-http exposes the metrics endpoint via a dedicated [IP]:port. If set, this option implicitly
#   enables metrics as well, e.g. "10.0.1.1:9090" or ":9090"
#
# enable-metrics: false
# metrics-listen-http:

# Profiling
#
# ntfy can expose Go's net/http/pprof endpoints to support profiling of the ntfy server. If enabled, ntfy will listen
# on a dedicated listen IP/port, which can be accessed via the web browser on http://:/debug/pprof/.
# This can be helpful to expose bottlenecks, and visualize call flows. See https://pkg.go.dev/net/http/pprof for details.
#
# profile-listen-http:

# Logging options
#
# By default, ntfy logs to the console (stderr), with an "info" log level, and in a human-readable text format.
# ntfy supports five different log levels, can also write to a file, log as JSON, and even supports granular
# log level overrides for easier debugging. Some options (log-level and log-level-overrides) can be hot reloaded
# by calling "kill -HUP $pid" or "systemctl reload ntfy".
#
# - log-format defines the output format, can be "text" (default) or "json"
# - log-file is a filename to write logs to. If this is not set, ntfy logs to stderr.
# - log-level defines the default log level, can be one of "trace", "debug", "info" (default), "warn" or "error".
#   Be aware that "debug" (and particularly "trace") can be VERY CHATTY. Only turn them on briefly for debugging purposes.
# - log-level-overrides lets you override the log level if certain fields match. This is incredibly powerful
#   for debugging certain parts of the system (e.g. only the account management, or only a certain visitor).
#   This is an array of strings in the format:
#      - "field=value -> level" to match a value exactly, e.g. "tag=manager -> trace"
#      - "field -> level" to match any value, e.g. "time_taken_ms -> debug"
#   Warning: Using log-level-overrides has a performance penalty. Only use it for temporary debugging.
#
# Check your permissions:
#   If you are running ntfy with systemd, make sure this log file is owned by the
#   ntfy user and group by running: chown ntfy.ntfy .
#
# Example (good for production):
#   log-level: info
#   log-format: json
#   log-file: /var/log/ntfy.log
#
# Example level overrides (for debugging, only use temporarily):
#   log-level-overrides:
#      - "tag=manager -> trace"
#      - "visitor_ip=1.2.3.4 -> debug"
#      - "time_taken_ms -> debug"
#
# log-level: info
# log-level-overrides:
# log-format: text
# log-file:
Step-by-Step Configuration
Create the server.yml File: Start by creating a server.yml file on your host machine. You can use the sample configuration provided in the ntfy documentation as a starting template.
Edit the Configuration: Modify the server.yml file according to your requirements. Here’s a brief overview of some key settings you might want to configure:
listen-http: Set the HTTP listen address, by default it listens on all interfaces on port 80.
firebase-key-file: If using Firebase for mobile notifications, specify the path to your Firebase key file.
cache-file: Define a path to cache messages; useful for maintaining messages across restarts.
Place the server.yml File: The configuration file should be placed in /etc/ntfy on the server where ntfy is running. You can mount this directory from your host to the Docker container:
docker run -v /path/to/your/config:/etc/ntfy ...
Example Docker Command with server.yml
Here’s how you might run ntfy with a custom configuration file using Docker:
docker run -d -v /path/to/your/server.yml:/etc/ntfy/server.yml -p 80:80 binwiederhier/ntfy serve
Conclusion
It's clear that this powerful notification tool offers a flexible and scalable solution for a variety of notification needs. Whether you're a developer looking to integrate notifications into your projects or a system administrator needing to keep tabs on system health and events, Ntfy provides a robust platform that's both easy to set up and highly customizable.
With the detailed installation methods that were covered—from basic setups to more advanced configurations using Docker Compose—you now have the tools necessary to deploy Ntfy in a way that best fits your operational environment. The ability to extend functionality with webhooks further enhances Ntfy's utility, making it an indispensable tool in your development and monitoring arsenal.
Remember, the key to effective implementation lies in understanding your specific requirements and tailoring the configuration accordingly. By leveraging the power of Docker, you can ensure that your Ntfy deployment is both secure and efficient, ready to handle whatever notification challenges come your way.
Thank you for joining this technical journey. I hope this guide empowers you to streamline your notification processes and enhances your project's capability to communicate effectively across various platforms. For any further customization or troubleshooting needs, always refer back to the official Ntfy documentation and the vibrant community forums. Stay tuned for more insights and guides on leveraging powerful tools like Ntfy in your technology stack.